Services — wiring and installation support
CCTV Wiring and Installation Support: CAT6 Runs, PoE Placement and Acceptance Checks
Cabling is where a camera system is won or lost, and it is the one layer nobody can improve later without opening the walls. This page is the wiring standard we design to and the support we provide around it: how far CAT6 can carry power and data, what to do past that limit, where the switches and the recorder belong, how to protect the runs, the order the work should follow, and the checks that decide whether a system is accepted or reworked. We do not send crews to your site — the physical work is done by your installers or a local contractor, with our engineers available remotely while they do it.
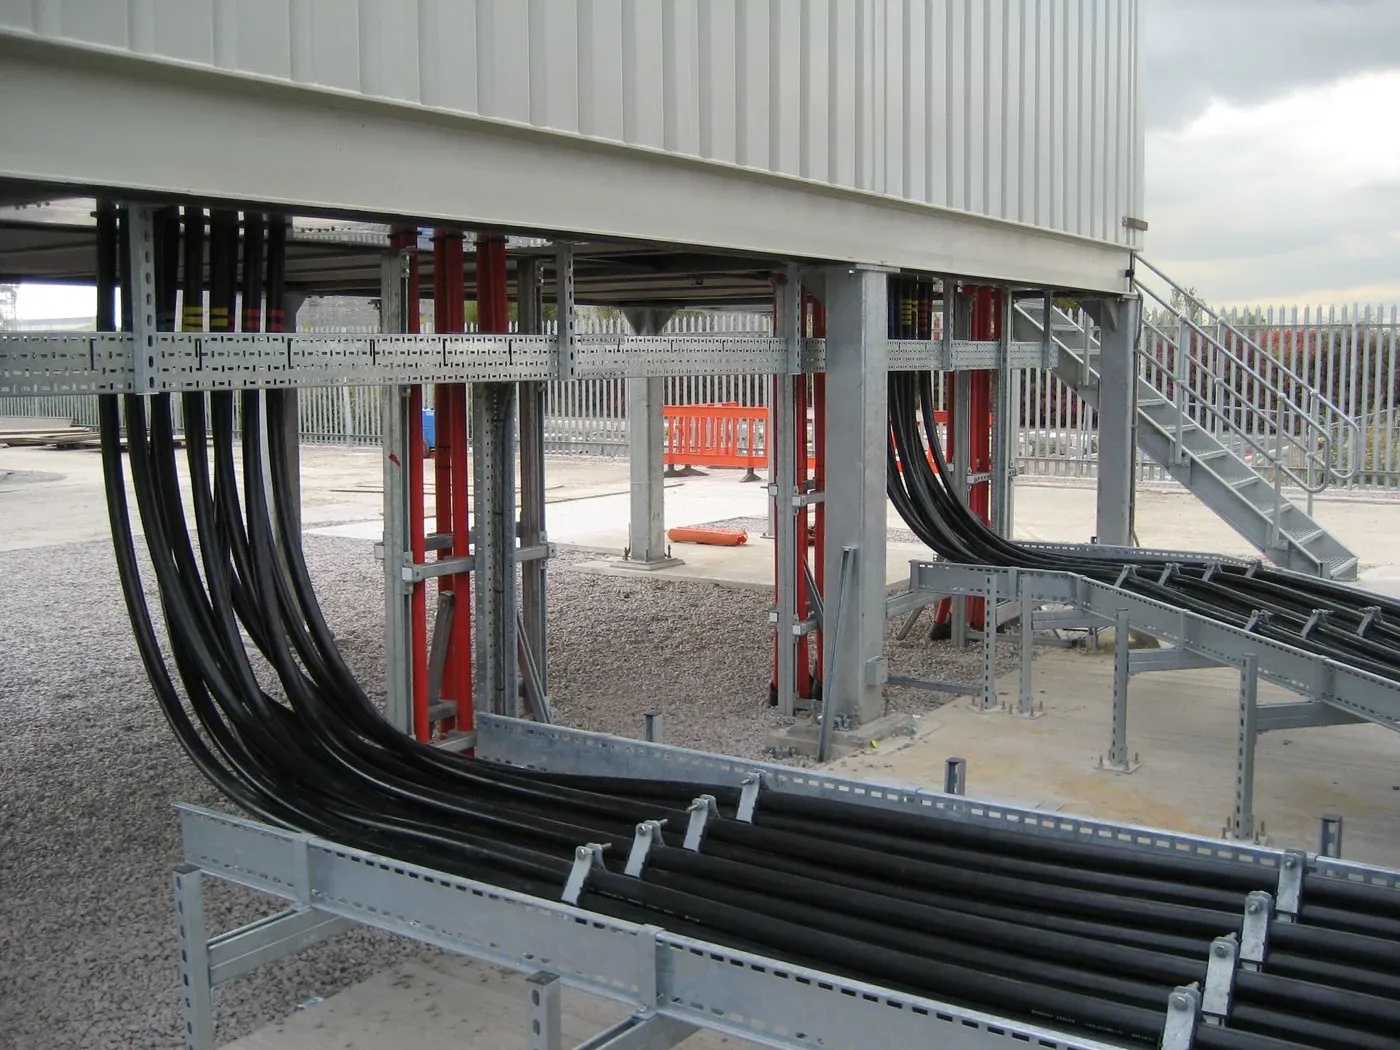
- The 100 m copper limit, and the four honest ways past it
- Cabinet and switch placement counted per riser, not per building
- Surge protection, earthing and outdoor run practice
- A sequence and an acceptance checklist you can hand to the crew
What you get
The output first, the process after. Every item maps to a line on the quotation.
- 01 Run list and cabinet schedule Every drop with its route, its length and the cabinet it lands in, plus the port map for each cabinet — the document the crew works from and the document you keep at handover.
- 02 Cable and accessory specification Conductor, category, jacket, termination standard and testing requirement, with the accessories that belong to the run — conduit, glands, patch leads, mounts and service loops — on their own lines in the bill of materials.
- 03 Single-line wiring diagram One drawing showing cameras, cabinets, switch models, PoE budget per cabinet, the uplink between cabinets, the recorder and the display layer, with the distance-critical runs marked.
- 04 Installation sequence and acceptance checklist The eight-step order above and the handover checklist, formatted so it can be printed and handed to an installation crew or a local contractor on day one.
- 05 Remote commissioning support Our engineers join your installer remotely for switch power-up, camera onboarding, recording schedules, remote access and the acceptance walk-through. The physical work stays with your team or your local contractor; the configuration and the checks are done with us.
The 100 m rule and what to do past it
| Option | What it gives you | When to use it |
|---|---|---|
| Standard CAT6 run from the local cabinet | Up to 100 m with power and data on one cable, at 100 Mbps on the PS series or full gigabit on the 24G02GS-P | Every position inside the run limit — the default for indoor cameras |
| Extend mode on the PS series, ports 1–8 | Up to 250 m at 10 Mbps with port isolation, power and data on the same run | A gatehouse, a perimeter pole, a remote sub-station: one camera on the port, no other traffic sharing it |
| A satellite switch in its own cabinet, fed from the head-end | Full rate at the far end, with its own port count and its own PoE budget | A long building, a second block, a loading dock 150 m from the nearest cabinet |
| An SFP fibre uplink between cabinets | A multi-hundred-metre backbone at full rate between cabinets | Riser cabinets in a tower, or separate buildings on one site |
More detail
PoE over copper is a 100 m technology. On a CAT6 run inside that distance the same cable carries power and data to the camera, and the camera never sees a separate power supply. Past 100 m nothing about the camera changes — the link simply stops being reliable, and the failure shows up as a stream that drops at night or a camera that reboots when the illuminator comes on.
There are four legitimate ways to reach a position beyond 100 m. Three of them are cable-design answers and one is a bandwidth trade, and using the wrong one is how a building ends up with a camera nobody can watch properly.
Do not couple or splice CAT6 mid-run to reach further. A coupler adds a loss point that passes a continuity test on the day of installation and appears as a dropped stream months later, usually at night and usually on the camera the client cares about. Put a switch or an Extend-mode port at the far end instead.
Where the switch, the cabinet and the recorder go
The switch position decides the cable count and therefore most of the installation cost. A switch placed where the cable naturally lands saves more metres than any cable choice, and it is the decision most often taken late, after the ceiling is closed.
- Count cabinets per riser. PoE reaches 100 m, so a tower needs a cabinet roughly every six to eight floors, each with its own port count and wattage budget.
- One cabinet per separate block or building. Feed the satellite cabinets over an SFP uplink where the distance between them is long, rather than pulling every camera back to one room.
- Put the switch and the recorder in the same locked room where the site allows it: one protected circuit, one place to troubleshoot, one door to control. Keep the rack off the floor and the room ventilated.
- Keep the recorder near the display. 4K over HDMI is a short-cable job; a long display run wants a decoder or an extender, not a longer cable.
- Do not feed the cabinet from a circuit shared with lifts, pumps or plant. A camera system that reboots when the compressor starts will be blamed for the reboot.
- Write the cabinet port map on the inside of the door, and label both ends of every run at the time it is terminated. That one sheet is the difference between a one-hour fault and a one-day hunt in a riser.
- Leave the spare ports genuinely spare — not “spare” because two cameras are still in a box on the floor.
More detail
Plan the cabinets before the cameras. Each cabinet has a port count, a wattage budget and a run limit of its own, and the run from that cabinet to the farthest camera on the floor is what validates the design — not the total camera count of the building.
Surge, earthing and outdoor runs
The cameras carry 6 KV common-mode surge protection on the network port, 1.5 KV differential, plus lightning and static protection on the power input. That protects the device against a surge that arrives on its own cable; it does not earth the pole the camera is bolted to, and it does not replace the building’s earthing.
- Bond and earth the cabinet, the pole and any metal housing to the building’s earth. A camera on a metal pole is only as protected as the pole is.
- Bring outdoor cable into the housing from below where the enclosure allows it, with a drip loop below the gland, so water runs off the cable rather than into the connector.
- Prefer duct or conduit over an aerial span. Where a span is unavoidable, keep it short, take the strain off the connector, and count the span as the worst case when you check the run against the 100 m limit.
- Keep CCTV cable out of the same conduit and tray as mains wiring; where a crossing cannot be avoided, cross at a right angle.
- Keep runs clear of lift motor cables, pump starters and variable-speed drives. If a run has to pass a plant room, use conduit and note it on the run list.
- Fit surge protection at the head end on long outdoor runs where the site has a history of strikes, and record the fitting in the cabinet schedule so the next technician knows it is there.
Cable selection: what to specify, and the one mistake to avoid
| Item | What to specify | Why it matters |
|---|---|---|
| Conductor | Solid bare copper, 23 AWG, throughout | The alternative sold in many markets is copper-clad aluminium, which is lighter, cheaper and loses voltage over distance. On a long PoE run it is the difference between a camera that boots and one that drops out at night with the illuminator drawing power |
| Category | CAT6 as standard on every new run | CAT5e will carry 1000BASE-T to 100 m, and it still appears in quotes. For the difference in cost per box, CAT6 buys headroom on the run and on the future use of the same cable — and installing it once is the whole point of the exercise |
| Jacket | Indoor jacket inside; UV-stable PE jacket for outdoor, duct or exposed routes | An indoor jacket on an outdoor route fails at the jacket first and the conductor second. Gel-filled cable is for sites that genuinely flood; it is stiff, slower to terminate and rarely the right answer for a building |
| Termination | T568B throughout, on RJ45 plugs or a patch panel, with a service loop of 2–3 m at each camera | Mixed termination standards produce crossed pairs that pass a link test and fail at speed. The service loop is what turns a failed camera into a five-minute swap instead of a new cable pull |
| Accessories in the same order | Faceplates, patch leads, conduit, glands, drip loops, camera mounts, housings, and surge modules where specified | Accessories bought locally mid-programme are the most common reason a job stops for a week — and they are the cheapest thing to add to the container |
| Testing | A wire-map and length test on every run, recorded in the run list | A run that was never tested is a fault waiting for a rainy Tuesday. The record also settles disputes with the crew before the ceiling closes |
More detail
Cable is the cheapest line in most buildings and the most expensive one to change afterwards. The specification below is what we quote, and it is deliberately boring: solid copper, CAT6, the right jacket for the route, and a tested termination at both ends.
The sequence that avoids rework
The order below is the one that keeps a building programme intact. It is written so it can be handed to an installation crew as it stands, and it assumes the crew is yours or a local contractor’s — our engineers join remotely for the power-up, commissioning and handover stages.
- 1. Mark every position on site and confirm the view before drilling. A camera that has to move 300 mm after the ceiling is closed costs more than the whole bracket order.
- 2. Install conduit, tray, back boxes and pull cords; leave the pull cords in place for the cabling stage.
- 3. Pull cable to the cabinet, and label both ends before anything is terminated. Unlabelled cable in a riser is the single most common cause of a day lost on a building.
- 4. Terminate, then test every run — wire map and length — and record the results in the run list while the crew is still on the floor.
- 5. Fit housings, brackets and cameras, leaving the 2–3 m service loop at each camera end and sealing every outdoor entry.
- 6. Rack the PoE switch and the recorder, power the switch, and confirm link and PoE on every port before a single camera is commissioned. Ports first, pictures second.
- 7. Add the cameras to the recorder, set the recording schedule, resolution and retention, then aim and focus each camera against the live picture rather than against the drawing.
- 8. Walk the acceptance tests with the client: live view, playback, search, export, remote view on a phone, one alert on one camera, and a restart after the cabinet is switched off and on.
Acceptance checks, and the five reasons sites get reworked
| Check | Pass condition |
|---|---|
| Every run | Wire map correct, length recorded, and the run present in the run list with both ends labelled to the drawing |
| PoE | Link and PoE indication on every camera port, and the total load measured against the switch budget with headroom left |
| Picture | Each camera aimed, in focus, and recording at the agreed resolution and frame rate — checked at night as well as in daylight |
| Recording | Recording schedule and retention set per channel group, and the storage calculation re-checked against the drives actually installed |
| Remote view | Client installed on the agreed devices, one account per role, and remote access tested from outside the site network |
| Cabinet | Switch and recorder on a protected circuit, port map on the door, and the room locked and ventilated |
| Handover pack | Run list, cabinet schedule, admin passwords in a sealed envelope, and one page of procedure for the person who watches the screen |
- No service loop at the camera end, so a failed camera becomes a new cable pull instead of a swap.
- Copper-clad aluminium cable on long PoE runs, discovered only when cameras drop out at night.
- A run past 100 m that was measured from the wrong cabinet, discovered after termination.
- Cameras aimed from the drawing rather than the live picture, so the position meant to cover the gate covers the wall next to it.
- Unlabelled runs in a riser, which turn every future fault into a search rather than a repair.
More detail
An installation is accepted when it can be maintained, not when the pictures appear. Use the table below as the handover checklist, and use the list after it as the list of things to check before the ceiling closes — every one of them is a rework we have seen reported back from projects.
Commissioning before handover
Commissioning is a sequence, not a single visit: switch power and PoE budget first, then camera discovery and addressing, then recording profiles and retention, then remote access — and only then the acceptance walk with the client, position by position.
Frequently asked questions
How far can a PoE camera run on CAT6?
100 m from the switch port, in standard mode, with power and data on the same cable — and that is a hard limit rather than a guideline. Past it, the options are a satellite switch in its own cabinet, an SFP fibre uplink between cabinets, or the Extend mode on the PS series, which reaches 250 m at 10 Mbps with port isolation on ports 1–8. The mistake to avoid is measuring from the head-end room instead of from the cabinet that actually serves the camera; most “impossible” runs turn out to be runs measured from the wrong end. Draw the cabinets first, then the cable, then the cameras.
Does 250 m Extend mode really work, or is it a trick?
It works, within its own terms. With the DIP switch in Extend mode, ports 1–8 carry data and power to 250 m, but the port rate drops to 10 Mbps and port isolation is enabled so that each PoE port speaks only to the uplink. That is enough for one 5 MP camera on H.265+ at a gatehouse, a far perimeter pole or a sub-station, and it removes the need for a second cabinet in a difficult location. It is not a way to feed several channels, and it is the wrong port to put a camera that has to sit in a multi-view wall with everything else. Use it deliberately, for a named position, and mark it on the drawing.
Is CAT5e good enough, or do we need CAT6?
CAT5e will carry 1000BASE-T to 100 m and it still appears in quotations, so the honest answer is that it will usually work. We quote CAT6 as standard for two reasons. The first is margin: the cable you install is the one layer nobody upgrades later without opening walls, and the price difference per box is small against the cost of a second pull. The second is that the accessories and the test equipment around CAT6 are what good installers already carry. Where a client insists on CAT5e for budget reasons, we will design it in and mark it in the bill of materials rather than pretend the difference does not exist.
Who does the installation, and what does that mean for warranty?
Your team or a local contractor does the physical work: cable pulling, conduit, mounting, housings, power circuits and the hands on site during commissioning. Our role is design, supply and remote support, which we state in writing with the quotation. That split does not affect the hardware warranty, which covers the units we supply, but it does mean the workmanship of the installation is the installer’s responsibility rather than ours. In practice this boundary is where most international projects either run well or run badly: the projects that run well are the ones where the local installer reads the run list and the acceptance checklist before starting, not after finishing.
Can you help our installer while they are on site?
Yes, remotely. Our engineers are available over the messaging and email channels on this site through switch power-up, camera onboarding, recording schedules, remote access and the acceptance walk-through, and they can review photos of a cabinet or a termination and tell you what is wrong without anyone flying anywhere. What we do not do is dispatch staff to site. If a project needs a person with a ladder, that person is arranged locally — by you, your client or your contractor — and we will answer their questions as fast as they ask them, including on the day of handover.
Plan Your CCTV or Video Wall Project
Send us the building type, floor count and camera estimate — we will come back with a system layout, a bill of materials and a price.